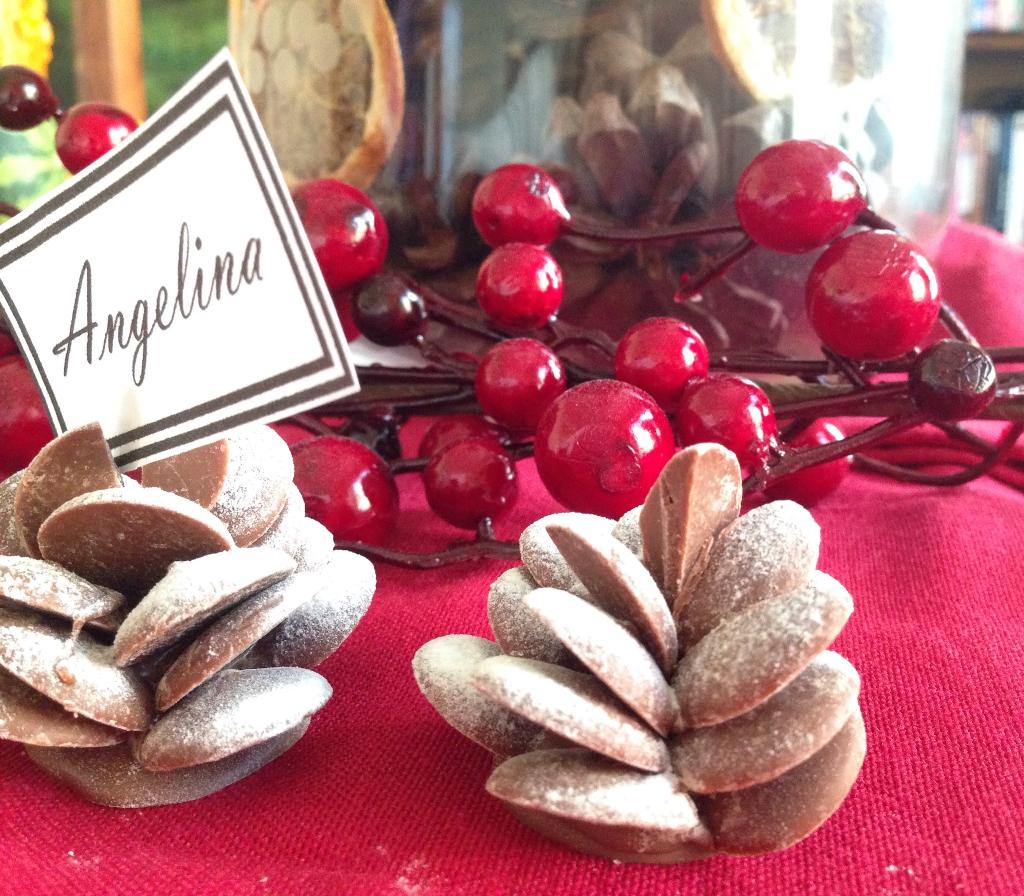
The beauty of these edible chocolate pine cones, apart from them just being beautiful to look at, is that you can give them as a gift, or use them as place card holders for dinner on Christmas Day. Oh yes, they are also yummy too… of course.
They aren’t really that tricky to make–it just takes chocolate buttons and some melted chocolate–but there is a bit of construction involved, if you want to get them looking their wintery best. You’ll see from our photos that all of the three pictured look a little different, but that is the beauty of making something look natural. In nature things are different and imperfect, and the world of chocolate is no different 🙂
Stuff You’ll Need
- Melted milk chocolate
- Milk chocolate buttons
- Icing sugar to decorate (optional)
- Greaseproof paper/baking parchment
Let’s Get Going
1. Put a small amount of chocolate in a microwaveable bowl, heat it in 20 second intervals in the microwave, stirring each time, until the chocolate has melted.
2. Spread a teaspoon of melted chocolate onto a sheet of greaseproof paper, so it makes a disc about 2-3 cm (1 inch) in diameter. It doesn’t need to be a perfect circle. Put it to one side to set a little.
3. When the chocolate is soft set–it won’t move but isn’t set hard, almost bendable–you can start the next stage. Re-melt the chocolate in the bowl, if needed. Pick up a chocolate button and dip one end into the melted chocolate.
4. Push the button into the chocolate disc on the paper, at a slight angle. Continue going around the disc doing the same thing–the first layer will probably be about 4-5 buttons.
5. Do the same with the second layer, with this set of buttons inside the first set, and overlapping a little. Continue in this fashion until there’s little room left in the middle.
6. Cut a couple of buttons in half. Dip these into melted chocolate, as you did before, and place these vertically into the centre to create the point of the cone. You can use anything from 1-3 halves to finish off the cone. Leave to set.
7. Peel your chocolate button pine cones from the paper. You can give them a dusting of icing sugar snow to make it look even more wintery, or leave them naked and natural.
You should be able to easily slot in a place card between the top notches of your pine cone 🙂
If you have any melted chocolate left, then don’t let it go to waste–I know none of you would waste chocolate!–you could make some jazzies. Click on the pic below for full instructions–it’s easy!


Leave a Reply