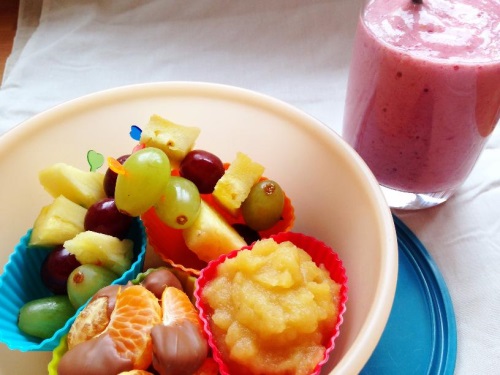
 “I’m bored with bananas, I don’t like apples, and oranges are too hard to peel!”
Does this sound familiar? Well, you aren’t alone. Although we know that eating healthily is important, and that a lot of fruit is really yummy, sometimes it can look a bit sad in our lunchboxes. If fruit is the thing that you look forward to the least at lunchtime, then we have five really cool ways of making it more fun and delicious.
 1. Applesauce
This may sound a little strange, but bear with me. Applesauce is a common fruit snack in the USA and it contains no added sugar. So you get all the yumminess of apples but without the skin (not a favourite with most mini yummers) and without the worry of your apple going brown.
Stuff You’ll Need
Six eating apples will make about four portions of apple sauce–so you get more than one portion of fruit in one portion of applesauce. But you can make as much as you like, depending on what apples you have. Applesauce freezes really well so it’s worth making a batch.
- Eating apples
- Water (one tablespoon for each apple)
Let’s Get Going
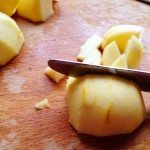 1. Peel your apples, and then pass to a grown-up to core them and cut them into halves for you.
2. Put half an apple flat side down onto a chopping board, and use a regular dinner knife to chop your apple into chunks.
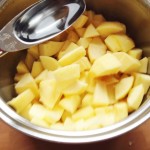 3. When all your apples have been cut into chunks, put them into a saucepan along with the water.
4. Cook for 30-40 minutes on a medium heat, stirring every now and then, until the apples have softened and broken down.
5. If there are still lumps in your sauce then you can easily mash them up to make it more smooth.
Now you can put your sauce into little containers and store in the fridge for tomorrow’s lunchbox, or put them in the freezer for another day.
Did You Know?
Applesauce can also be used as a natural sweetener when you are baking, instead of using as much sugar. It works brilliantly in recipes such as brownies.
 2. Chocolate-dipped Orange Pieces
Not as healthy as applesauce, but certainly a good option for your lunchbox every now and then, these choc-dipped oranges are sweet and juicy and you don’t have the worry of peeling them.
Stuff You’ll Need
- One clementine, tangerine, or similar
- 20g (1 oz) chocolate
Let’s Get Going
 1. Melt the chocolate in a small microwavable tub. While it’s melting, you (or a grown-up) can peel the orange.
2. Dip the individual pieces into the melted chocolate and put them on some greaseproof paper.
3. Leave to set at room temperature before storing in the fridge.
Did You Know?
Oranges are an excellent source of vitamin C. Vitamin C helps protect cells and keep us healthy. There have been scientific studies proving that vitamin C is excellent when you have a cold, as it helps to make your symptoms less yucky. So, these orange pieces are an especially good idea to munch on in the winter.
 3. Fruit Kebabs
You can use whatever fruit you like with these fruit kebabs (or fruit kabobs as some prefer to say), but some fruits work better than others. Apples and bananas are not good options as they will have turned brown by the time you open your lunchbox.
Other than that, all you need are some food picks or cocktail sticks. Food picks come in different styles and colours and help to make a lunchbox more cheery. The ones we used here cost less than £2 for over 100 of them–there are loads on eBay.
Stuff You’ll Need
Any of these fruits are good:
- Strawberries
- Grapes
- Pineapple (tinned is fine)
- Melon
- Cherries (stoned)
Why Not Add Some Calcium
Fruit kebabs can be extra delicious if you have something to dip them in. Try yoghurt or cream cheese as a tasty dip for your kabobs, which will also add some calcium to your lunch. Remember: Calcium helps us to grow strong and healthy bones.
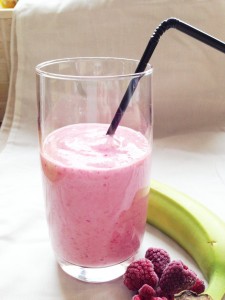 4. Banana & Berry Smoothie
Everyone likes bananas, but having them everyday can get boring. And cutting them up to choc-dip them or pop them in a fruit kebab isn’t an option because they would go brown. Making a smoothie to pop in a bottle or drinking pouch is the perfect answer.
Although this banana and berry smoothie is a great combo, you can put in whatever fruit you like really, depending on what you have in the fruit bowl or freezer–frozen fruits work brilliantly in smoothies.
Stuff You’ll Need
This recipe makes 3 child portions.
- One banana
- 80g (1/2 cup) of berries (strawberries and raspberries are best)
- 120ml (1/2 cup) skimmed milk
- 120ml (1/2 cup) apple juice
- Honey (optional)
Let’s Get Going
1. Put all your ingredients into a blender, and blitz it until smooth.
2. Take a spoon to taste, and add some honey for sweetness if you need to (some berries are more sour than others).
3. Pour into your drinks bottle, or invest in a reusable drinks pouch,which are brilliant for smoothies.
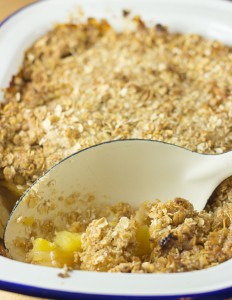 5. Oaty Apple Cobbler
Cobbler is kind of a cross between a crumble and a cakey top. In this recipe though, I’ve made it more healthy by using oats instead of flour and using only a minimum amount of butter–just enough to glue the topping together.
You can, of course, use up whatever fruit you have laying around. The advantage of the oaty topping, as well as tasting yummy and making fruit more palatable to little tastebuds, is that it gives sustained energy throughout the afternoon to keep mini yummers going until hometime.
I suggest the grown-up takes care of the chopping and coring of the apples, while the little chefs get busy making the oaty cobbler topping.
Stuff You’ll Need
- 4-5 Eating apples
- 100g (3/4 cup) Oats
- 130g (3/4 cup) Sugar
- 1 tsp Cinnamon
- 35g (2 1/2 tbsp) Butter/low-fat spread (I use Clover Lighter, which works brilliantly)
Let’s Get Going
Preheat the oven to 190c/180c fan/375f/gas 5
1. Peel, core and chop the apples into chunks. Put in a shallow ovenproof dish.
2. Mix together the oats, sugar and cinnamon in a bowl. Add the butter or spread (if using butter, you’ll need it to be soft), and mix together until the mix starts sticking together in lumps.
3. Dot the oaty topping over the apples.
4. Pop the dish into the oven for 40 minutes. Give it longer if needs be–the edges should be a dark golden brown.
Have some for after dinner and any leftovers can be popped into individual containers for the lunchbox. This cobbler recipe freezes well too.


Vanysa says
Why place in sealed pouch as oppose to pour into cups?
Wendy Finn says
I’m presuming you are referring to the smoothies? As these are all ideas for the lunchbox you need to think about how best to pack them so they don’t leak and your little one can access it easily. Not sure how a cup would work for lunch boxes, which is why I recommend a drinks bottle or a reusable pouch. Of course if you’re making these at home then you can seve them as you wish. Let me know if I’ve misunderstood your question.
Annabel Woolmer says
My girls have pretty much grown up on apple sauce. They like to mix in a bit of cream and then call it “eskimo porridge” – can’t remember where that came from, but it’s stuck. I love the Apple Cobbler Recipe. Would be easier for toddler chefs than making a crumble – going to share that one if that’s ok. I use an ‘apple master’ so my children can peel, chop and core their own apples. If you’ve never seen one, you just put an apple on it, they turn the handle and the peel spirals off – they love it! There’s a clip of my youngest using one aged 2 in this video: http://www.cookwithtoddlers.com/community/2015/2/11/can-toddlers-really-cook. Over from the #TheList x
Wendy Finn says
Oh I love the idea of eskimo porridge 🙂 I’m going to check out that apple gadget. I’ve seen them before but was never sure how well they worked, so it’s great to know you’ve had success. Everything else is easy in the cobbler recipe but apples can be pesky to prepare, and what kid doesn’t love a gadget! Always OK to share–I love that we’re sharing buddies 🙂
You Baby Me Mummy says
Oh love the smoothie and cobbler ideas, thanks for sharing the recipes x